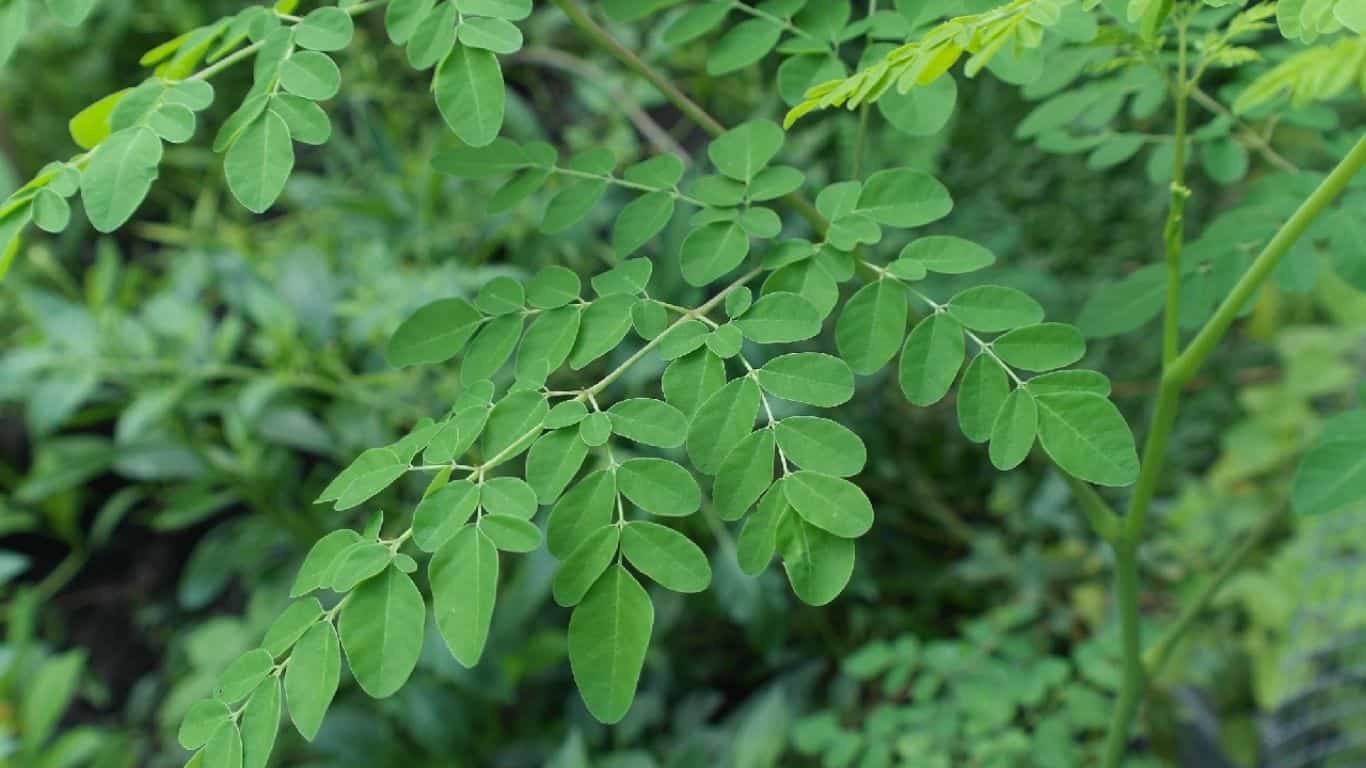
Today’s Topic of Discussion-“How to Grow Moringa Plants”How to Grow Moringa Plants?”. In the past few years, the Moringa plant has gained popularity outside its native cultivation areas. Moringa is a member of the Moringaceae family with the botanical name ‘Moringa Oleifera’. It is a native plant to India, Bangaladesh, and some parts of Africa. Traditionally Moringa is grown for its medicinal properties. This whole plant is edible and has specific benefits to deal with common health issues like indigestion, acidity, and other digestive complexities.
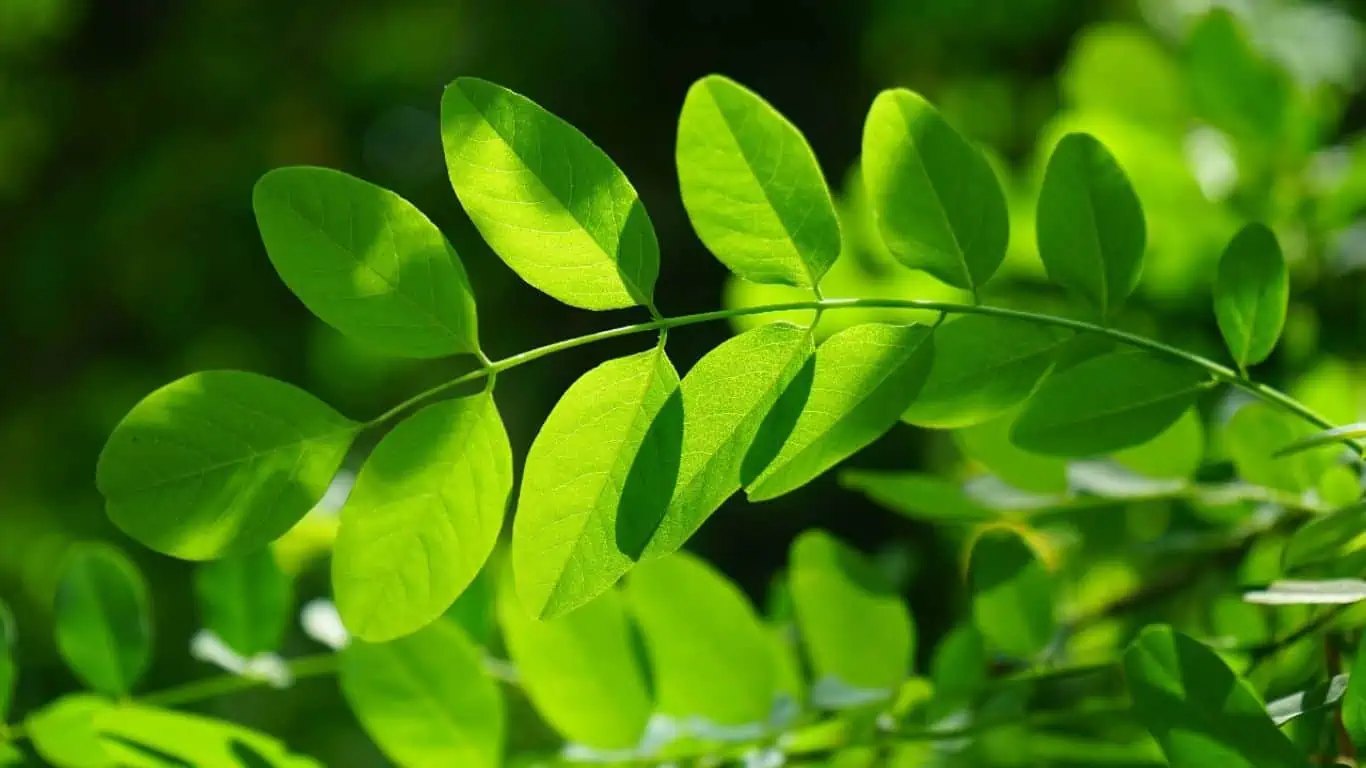
Moringa plant is also known as the Drumstick plant due to its beans that become thick like a drumstick on maturity. Growing Moringa is fairly easy both with seeds and stem cuttings. The only difference would be the time of plant maturity. As the stem will become a flowering tree in just 1 year whereas the seedling may take 3 or more years to mature.
This plant requires soft moist well-drained soil with neutral ph. You can easily grow them in containers with a healthy potting mix. Even sandy soil is good if it contains sufficient organic matter.
Although moring is easy to grow, it is also susceptible to several pest problems. Especially the moringa beans are susceptible to budworms and fruit borer larvae. These problems require quick and proper care else you may lose the seasonal cultivation.
Check out my previous post: How to Grow Hopi Red Dye Amaranth?
Moringa Plant Basic Info
- Common Name: Drumstick, Moringa, Ben Oil tree, Horseradish tree.
- Botanical name: Moringa Oleifera
- Family: Moringaceae
- Species: There are more than 13 different species of Moringa plants that can be grown for edible purposes. Although Moringaceae Oleifera is the most popular among all. Other popular Moringa species are Moringaceae arborea, Moringaceae borziana, Moringaceae longituba.
- Plant Type: It is a Soft Wood Tree.
- Plant Height: Moringa Plant can grow up to 30 feet high and span 15-20 feet wide.
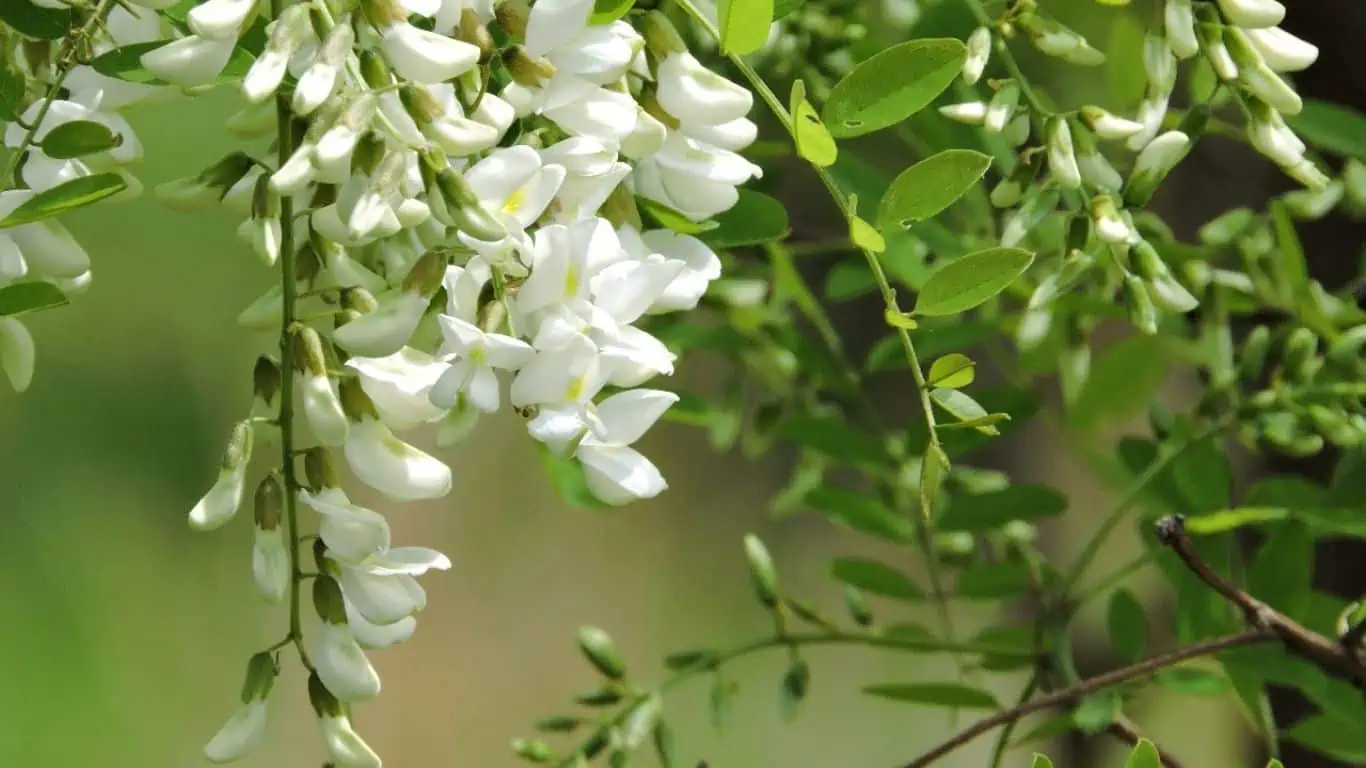
- Flower: Small cream-white flowers bloom in a bunch on the tip of new branches.
- Flowering Season: Flowering in Moringa starts in spring and soon the flower pollinates to develop Moringa beans.
- Origin: Moringa is a warm-weather tropical to subtropical plant. It is a native plant in South Asian Countries like India and Bangladesh.
- Hardiness Zone: This Plant can grow well in USDA hardiness zone 9 through 11.
- Soil Requirements: Moringa Plants need neutral to slightly acidic well-drained soil. Sandy soil with enough organic matter is good for these plants.
- Sunlight: These plants need full overhead sunlight for a minimum of 6 to 8 hours every day.
- Water and Fertilizer use: Moringa plants need moderate watering all year round with rich organic soil. You can increase watering with occasional all-purpose fertilizer during spring through summer.
- Propagation: Seeds and Cuttings.
- Uses: Moringa plant is an edible nutritious plant. Its leaves, beans as well as seeds are edible. Even moringa roots are used in traditional medicine.
20 Best Companion Plants for Radishes
Soil Preparation For Moringa Plants
Moringa is a warm-weather plant. It needs heat for faster growth. Direct Sunlight for 6 to 8 hours is sufficient to maintain enough warmth for the plant. Yet there is something else a plant needs. It is the nutrition and water that are fulfilled by the soil.
Therefore, Moringa plants require soft moist, and well-drained soil. This soil mix should have neutral to slightly acidic ph. This condition is not that difficult to maintain.
You can start with sandy or loamy soil. Amend the soil with compost, cocopeat, sand, or perlite to adjust the moisture retention.
Moringa plants can grow well in poor soil with scarce nutrition. Although you must provide sufficient nutrition and organic matter to get good cultivation. Aditional compost is beneficial, especially for moringas growing in containers.
I prefer 40% Clean garden soil with an equal amount of dry-aged Compost or manure with 10% Sand And 10% Cocopeat. If you want faster growth in the Moringa plant then add 1 spoon of Urea and NPK 20:20:20 fertilizer before watering every month.
Can You Grow Moringa in Containers?
Yes, we can grow Moringa plants in Containers or Pots. Moringa is one of the few plants or trees that can grow well in any container. Although a big and deep container is preferable. The available room for root growth will determine the overall plant growth and its mature height.
Moringa is a perennial plant, so you must consider the container accordingly. One important aspect of container gardening of moringa is that it cannot stay in one container for more than 3 years. There are 2 reasons for this situation. The first is that old moringa plants don’t produce good-quality pods or beans. Second, with continuous growth, these plants are more prone to root bound in containers. This may eventually damage the plant after a few years.
You should upgrade the container once in a few years and start with a big one to allow peace for at least 3 years. Another solution is to grow new moringas every couple of years. This is not a very feasible option in most cases.
Which Container is good for Moringa Plant?
A big 15-18 inch container is ideal for Moringa plants. It should have a similar depth. The more depth better the plants grow. Only make sure there are sufficient drainage holes in the bottom of this container. It is necessary to keep the soil well-drained otherwise it may lead to fungal growth in the soil. Soggy soil is the main reason for root rot in moringa plants.
If you are startingMoringa with a seedling then an 8-10 inch container is also fine for first-year growth. You have to move them to a bigger 12-15 inch container the next spring. Moringas grown for Stem Cuttings may require bigger 10-20 gallon containers for the time of plantation. It seems too much yet beneficial. A bigger cutting may start to yield in just 12-18 months of rooting.
Pros and Cons of Container Gardening
Propagation of Moringa Plants
Moringa plants can Propagate through their seeds as well as cuttings. The moringa seed looks similar to a large bean seed. You can buy these seeds online on Amazon or any other seed store. Only consider the quality of the seed as very old moringa seeds may germinate but the plant will not grow properly to fruit. All of this may take 3-5 years before you can look through the final result. So it is better to be careful during seed selection. Buy Moringa Seeds only from trusted sellers and check the viability date before purchase.
The next propagation method is stem cutting. This is probably the fastest method to grow Moringa for Cultivation. Native farmers prefer stem cutting over seeds as they are fast to grow and yield better fruits in the season. Another reason behind this approach is that Moringa plants need heavy pruning after fruiting. Almost 1/2 of the total tree size is chopped off at the season end. These stems are regrown as new moringa plants. A well-grown Moringa cutting can grow thrice or more in just 1 year of plantation. Some of them may start fruiting in the next season.
Therefore moringa Cuttings are more beneficial to grow than their seeds.
How To Grow Moringa From Seeds?
It is pretty easy to germinate and grow Moringa seeds. At first, you will need some viable seeds and you can get them from any local or online seed store. Next, start the preparation with soil and then continue reading.
- Select healthy mature seeds to grow Moringa plants. Check the viability date written on the package, if it’s not there then query the seller for more information. Healthy moringa seed is dark in color and hard to press. If the seed is soft light or squashy then it’s not good.
- Soak the seeds in clean water for 7-10 hours. This is completely optional yet it can speed up the germination so I prefer soaking moringa seeds.
- Meanwhile, prepare the soil for seed germination. You can either sow the soaked moringa seeds directly in garden soil or use a potting mix with compost for seed germination.
- Loose the soil and put each seed at a 1-inch depth and 2 inches apart from one another in a row. Don’t worry about the proper spacing at this time as you can separate or thin out extra seedlings later.
- Cover the seed with some soil mix and dampen the soil properly until it drips out of the container. In garden soil, just water is sufficient enough to wet the soil to a 10-inch depth.
- Keep an eye on the soil and never let it dry completely. Water once it feels dry on top.
- Place the seedling tray in full sun indoors or outdoors. It should get at least 6 hours of sunlight for proper germination.
- The moringa seeds should start germinating within 10 days and sprout properly within 20.
- Start thing the seedling once they grow 3-4 inches high. 5-7 inch tall seedlings are ready to transplant.
- transplant the seedlings in individual 4-6 inch pots for 2-3 months and then to bigger 8-10 inch containers until next season. You can transplant the moringa seedlings to their final destination once they grow taller than 10 inches with a few additional branches.
Grow Moringa From Stem Cutting
Stem Cutting is probably the fastest method to Propagate Moringa plants. Moringa stems are easy to root even in the plain soil mix. It does not require any rooting hormone unless you want to ensure successful rooting. The only thing to worry about in this method is the health of the parent moringa plant. Always collect stem cuttings from healthy and pest or disease-free moringa plants. The parent plant must not be too old.
- Any Moringa stems thicker than 1 inch in diameter is good to grow. Although I prefer stems thicker than 3 inches for faster and better growth. Don’t worry if you have a stem with only 1 or 3/4 inch in diameter. It will also grow although may take more time to mature and produce flowers and fruits.
- Cut a couple of 2 to 4 feet or 40-50 inch long stems from a healthy moringa tree. Use a sharp and clan pruner or knife for cutting. You should clean the tools with rubbing alcohol before cutting the stems. Never rely on a single cutting start with a couple to ensure the success of at least one of them.
- Remove most of the foliage from the cutting leaving only a few on the top. You can remove all of them if temperature and moisture are optimum in your locality.
- Bury these stems to 1/3 of their length in a soft moist well-drained soil mix. You can use the rooting hormone if you wish although it is not necessary.
- Place the cutting in full sun. If it is in a container then allow at least 6 hours of sunlight for better rooting.
- Keep the soil moist throughout the growing period. These cutting should develop new roots in 45-60 days.
- Separate them to their spot or container once they develop a few new branches and leaves.
- Use a 12-15 inch deep container for these Moringa Cutting. Grow only one Moringa plant in each container and don’t forget to change the container in 3 years.
- In the garden, separate each cutting by at least 4 feet. Moringa cuttings can grow 3 or 4 times their size in the garden just in one year. It only needs sufficient moisture and an abundance of organic matter in the soil.
How To Grow Moringa Plants in Containers?
- For Seedlings use 4-6 inch containers and For Moringa puttings use 10-15 gallon or 15-inch containers. Ensure there is a sufficient drainage hole in the containers.
- Fill the container with healthy potting soil mix. You can also use plain garden soil with compost, cocopeat, and perlite. Although commercial potting mix with 1/3 compost is the best combination for growing Moringa n Container or Pots.
- Half fill the container with soil mix and place the Seedling or cuttings in the center of the pot. Cover the sides with the same soil mix and gently tap to release any air pockets.
- Water thoroughly until it drips out of the drainage.
- Water only once or twice every week and never let the soil dry completely. Also, make sure it never gets too soggy else the plant may die.
- Feed these plants with all-purpose fertilizers once a month or couple. You can also use liquid fertilizers and biofertilizers once in 20 days. Although extra fertilization is not necessary for Moringa Plants.
- Keep the plants clean and prune the plants once after the summer season every year.
General Care For Moringa plants
- Always Care for Seed Selection and Stem Selection. These are the crucial steps for the overall health of the Moringa Plant.
- Use healthy Well-drained Soil to grow Moringa Plants. It Should have a slightly acidic to natural soil ph.
- Water only when requires. Just once or twice every week is sufficient for Moringas.
- Prune The moringa plant every year to 1/3 after the summer season. It will grow bigger next spring.
- Use neem oil and general pesticides before and after flowering. This will prevent any pest or diseases attacks on the Plant.
- Harvest the moringa beans before it becomes too hard like a stick. Generally, it tastes better when the beans are just thinner than your little finger. Thick beans are more fibrous and chewy with a mature seed inside them.
- You can start harvesting leaves once the Moringa plant grows taller than 3 feet. Although never pull off more than 1/3rd of total leaves at once from any plant.
- Moringa Flowers can be harvested during the early bloom period. Harvest flowers carefully as they are very fragile and never harvest more than 1/3 of the total flowers. Otherwise, it may lack fruits.
- Change old container every 3 years and if possible grow new plants in 3-5 years for better yield.
- Feed the Moringa plant with All-purpose fertilizer and Compost once during early spring. It will encourage heavy blooming and better fruit production in the season.